boost 설치 방법을 설명해 보겠습니다. boost library version 1.46.1 및 Microsoft Visual Studio 2005 환경입니다.

boost_1_46_1.zip 파일을 다운받습니다. 저는 D:\Project\Other\boost 폴더(이하 $root라 칭하겠음)에 zip 파일을 다운받아 놓는 것으로 가정합니다.
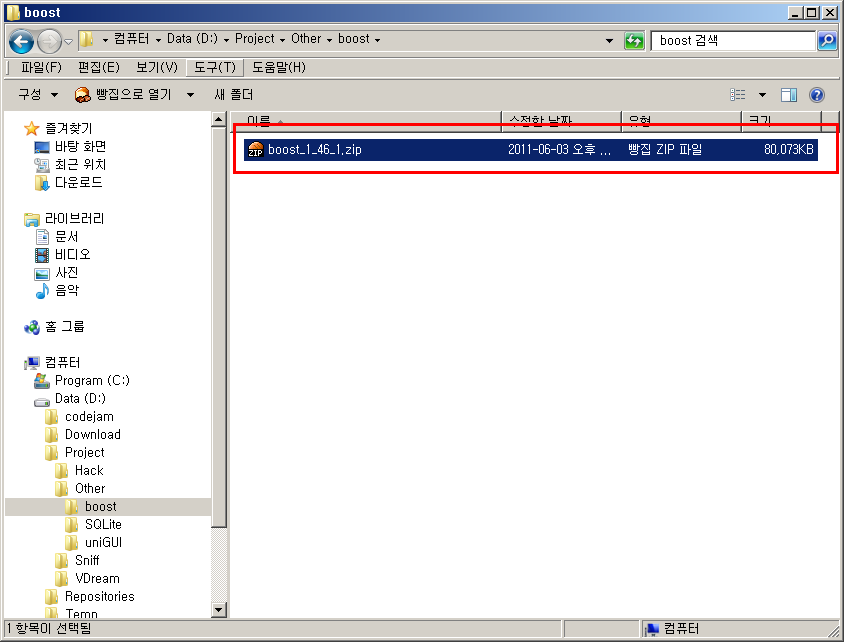
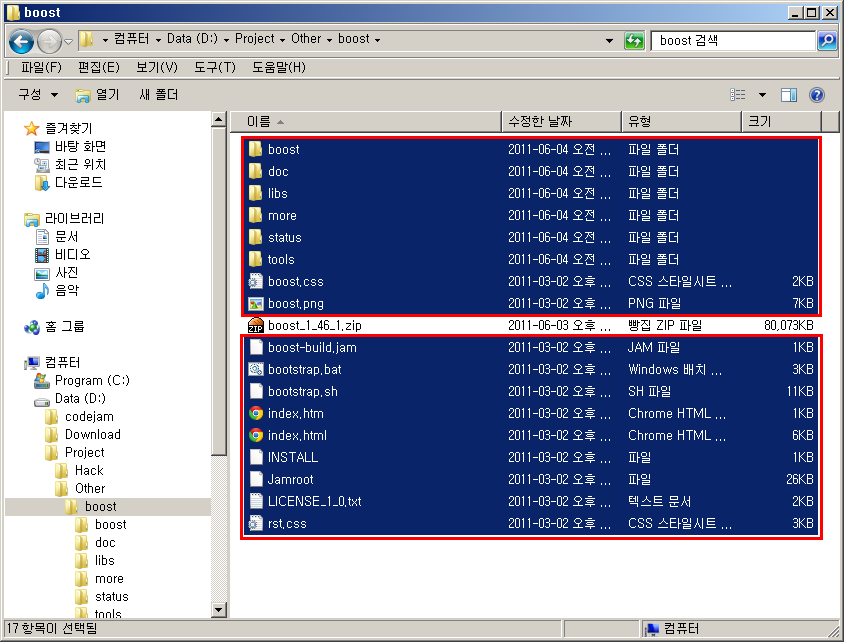
zip 파일을 풀어 놓습니다. zip 파일을 푸는 데도 시간이 좀 걸립니다(몇분). 압축 파일을 풀면 "boost_1_46_1"라는 폴더에 파일들이 해제가 됩니다. 파일들의 위치를 한단계 위로 이동시켜 줍니다.
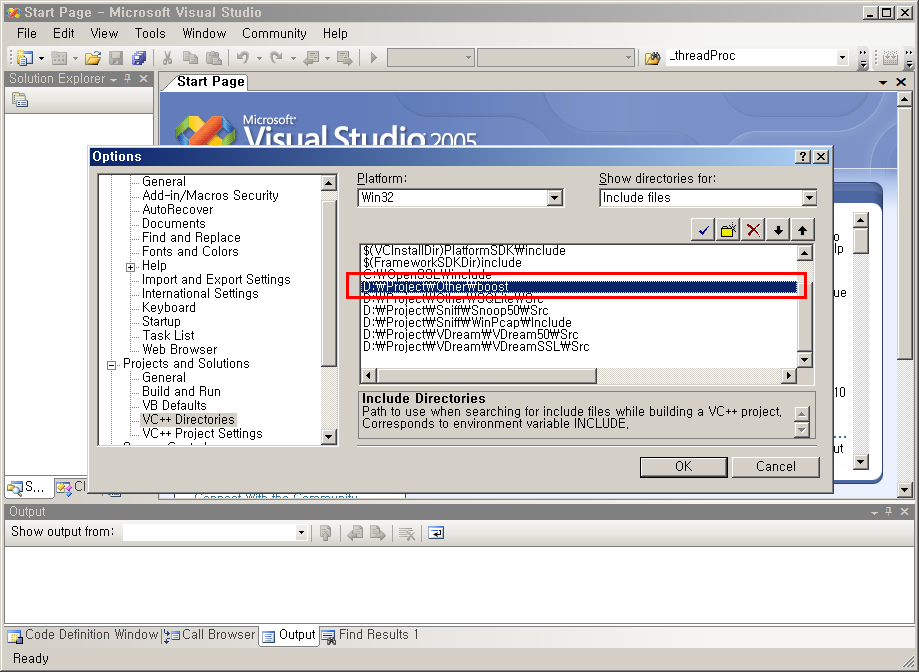
Visual Studio를 띄워서 테스트 코드가 컴파일 및 실행이 되는지를 확인합니다. 우선 boost 관련 path가 Visual Studio에 추가되어 있어야 합니다. Visual Studio - Tools - Options - Projects and Solutions - VC++ Directories - Win32 Platform - Include files에 ($root) path를 추가시켜 줍니다.
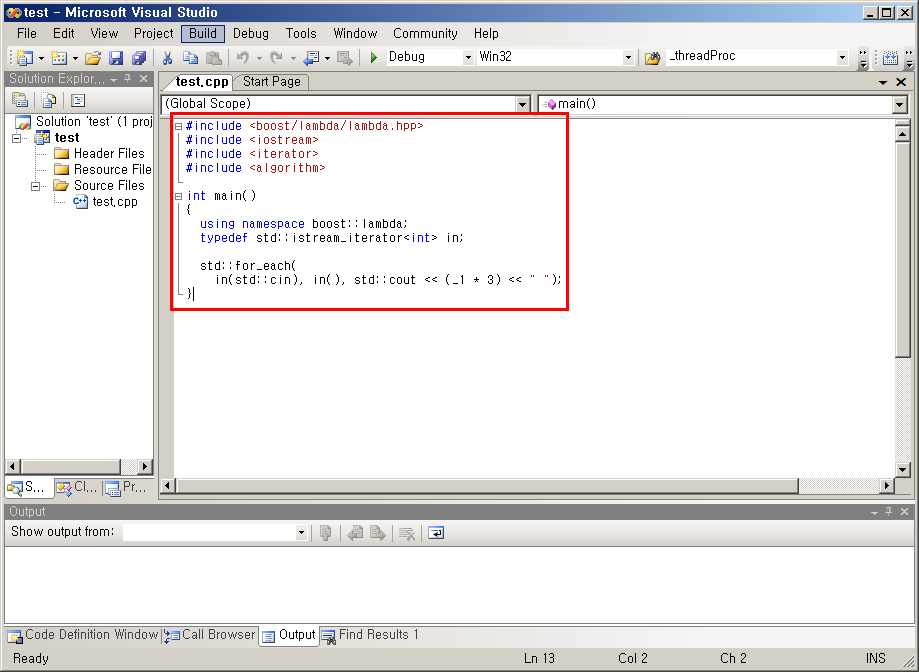
#include <boost/lambda/lambda.hpp>
#include <iostream>
#include <iterator>
#include <algorithm>

int main()
{
  using namespace boost::lambda;
  typedef std::istream_iterator<int> in;

  std::for_each(
    in(std::cin), in(), std::cout << (_1 * 3) << " ");
}
컴파일 및 실행까지 되면 boost 관련 header 파일 설정이 제대로 된 것입니다.
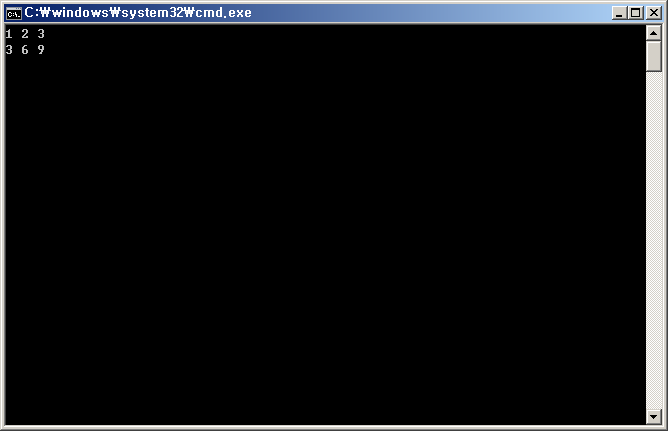
boost는 header 파일(*.hpp)만 있어도 사용이 가능한 모듈이 있고, cpp 파일을 컴파일한 library가 있어야만 작동하는 모듈도 있습니다. library가 필요한 모듈은 아래에 열거되어 있습니다(boost 홈페이지에서 발췌).
- Boost.Filesystem
- Boost.GraphParallel
- Boost.IOStreams
- Boost.MPI
- Boost.ProgramOptions
- Boost.Python (see the Boost.Python build documentation before building and installing it)
- Boost.Regex
- Boost.Serialization
- Boost.Signals
- Boost.System
- Boost.Thread
- Boost.Wave
boost library를 사용하기 위해서는 제일 처음 관련된 모듈을 컴파일하여 library 파일로 만들어 놓아야 합니다. 몇가지 단계가 있으며 다음과 같은 절차를 진행합니다.
우선 DOS command를 띄워서 ($root) 폴더로 이동한 다음에 "bootstrap.bat"파일을 실행시킵니다.
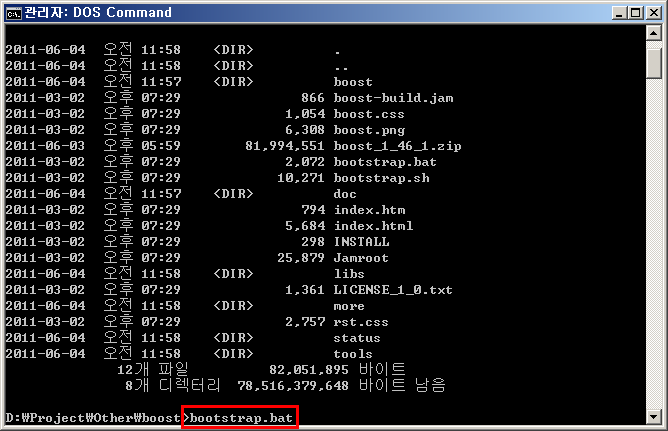
"bootstrap.bat"를 실행하면 Boost.Jam과 관련된 파일(bjam.exe, project-config.jam)이 생성되는 것을 확인할 수 있습니다.
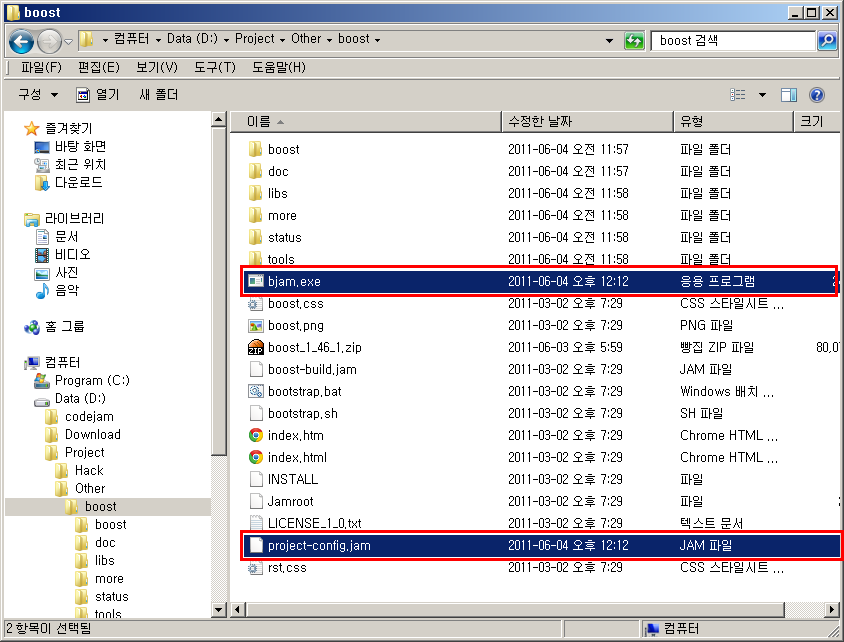
"bajm.exe" 파일을 실행시킵니다. 이 작업은 작업 시간이 많이 걸립니다. 커피 한잔 먹고 오거나 응가 한번 갔다 와 주는 센스를... ^^
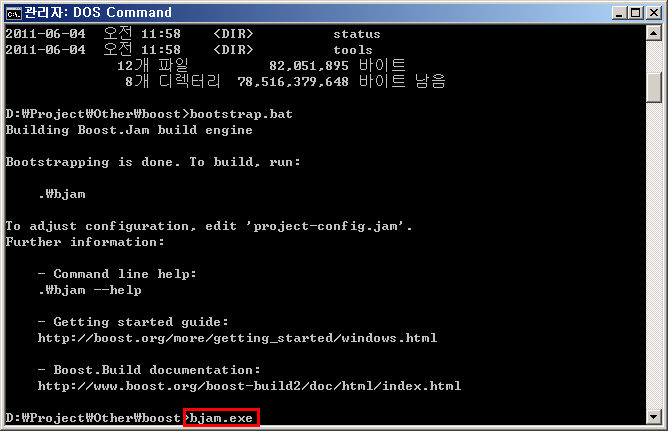
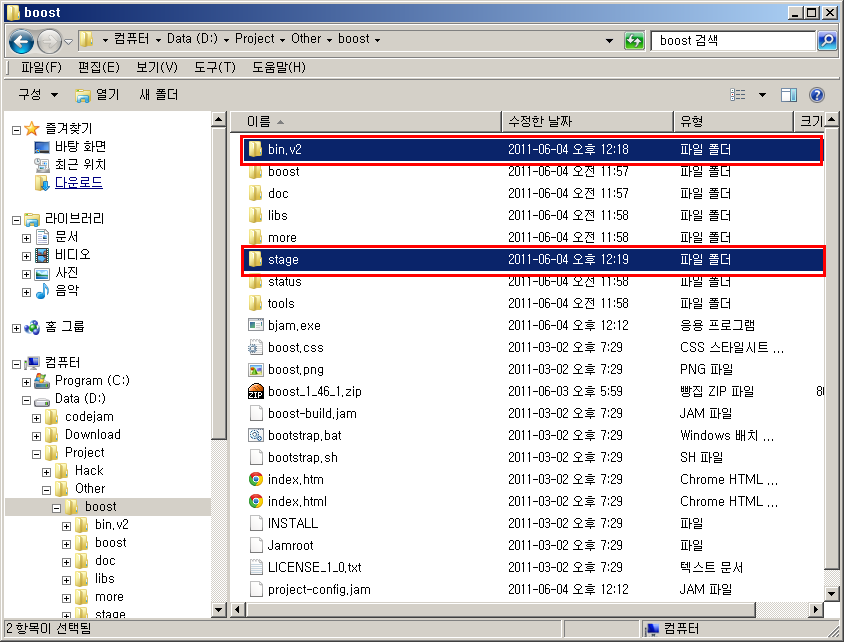
bjam.exe를 실행하면 다음과 같이 "bin.v2" 및 "stage" 폴더가 생깁니다.
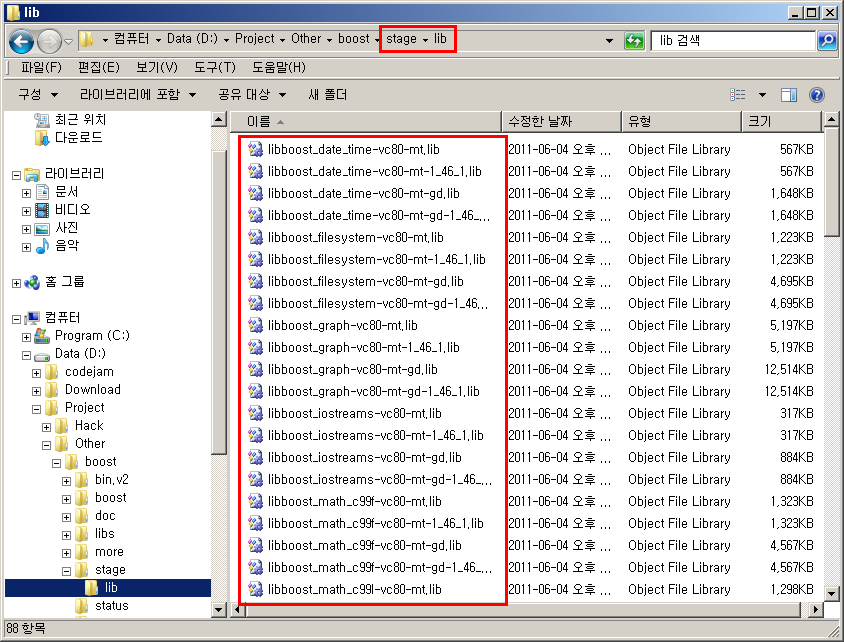
이중에 ($root)/stage/lib 폴더를 보면 확장자가 lib인 파일들을 볼 수가 있습니다. 아 파일들이 바로 boost를 사용할 때 링크가 되어 져야 할 파일들입니다.
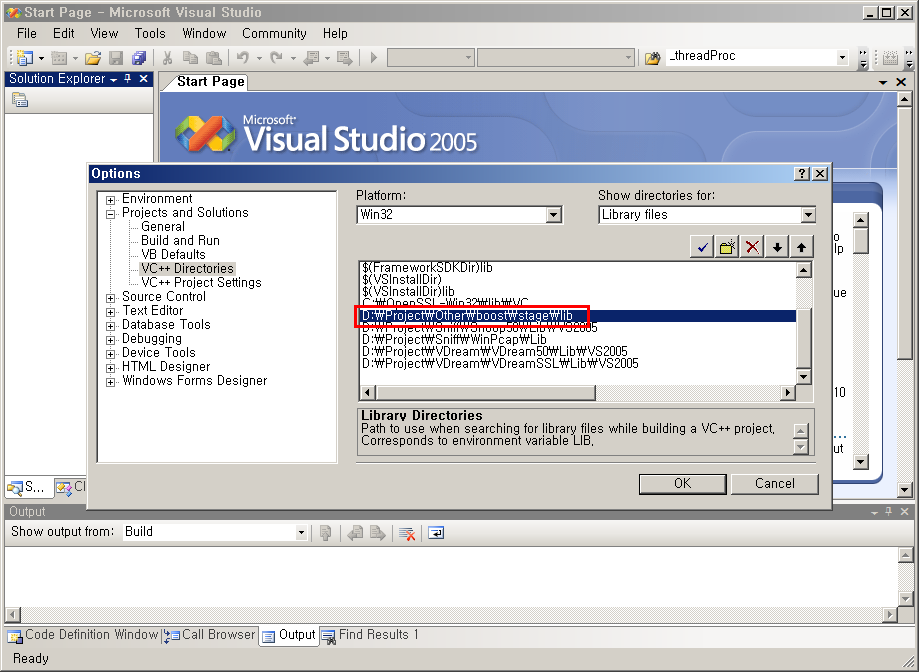
해당 library 파일들이 제대로 링크가 되어 지는지를 테스트해 보겠습니다. Visual Studio - Tools - Options - Projects and Solutions - VC++ Directories - Win32 Platform - Library files에 ($root)/stage/lib path를 추가시켜 줍니다.
다음 테스트 코드를 가지고 컴파일 및 링크가 제대로 되는지 확인을 합니다.
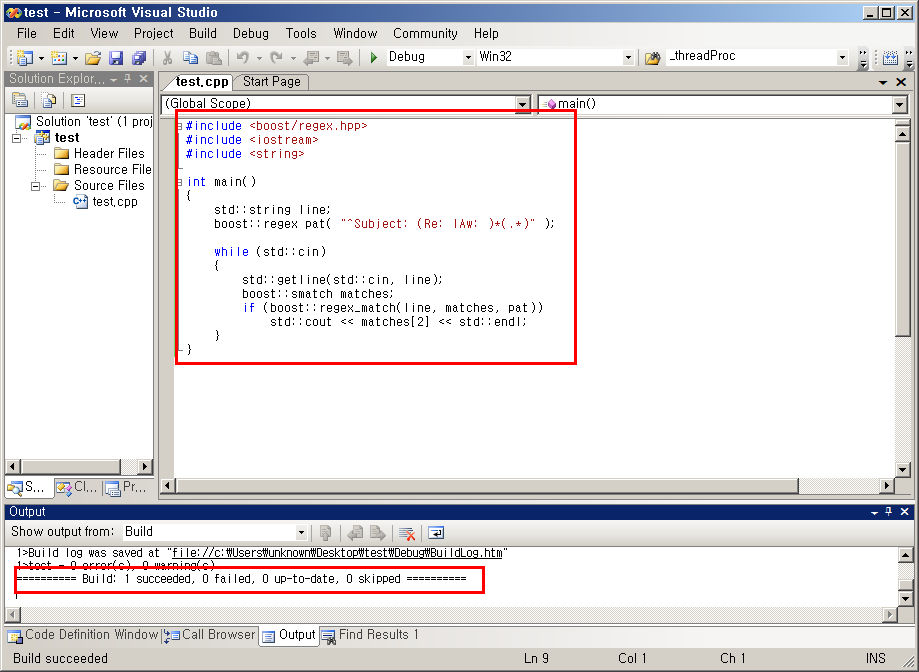
#include <boost/regex.hpp>
#include <iostream>
#include <string>

int main()
{
    std::string line;
    boost::regex pat( "^Subject: (Re: |Aw: )*(.*)" );

    while (std::cin)
    {
        std::getline(std::cin, line);
        boost::smatch matches;
        if (boost::regex_match(line, matches, pat))
            std::cout << matches[2] << std::endl;
    }
}
Release 모드에서도 컴파일 & 링크가 제대로 되는지 확인을 합니다.
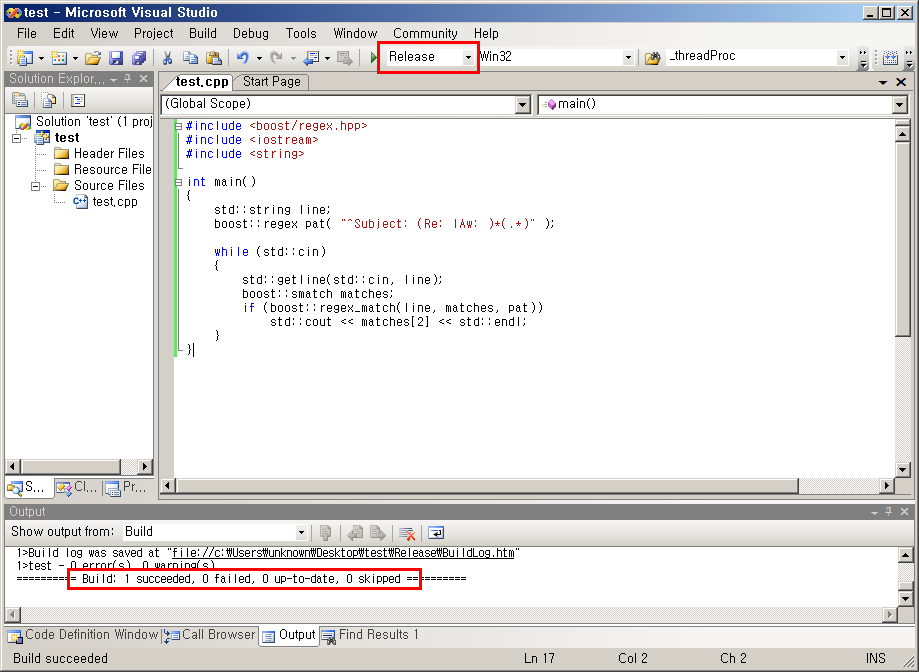
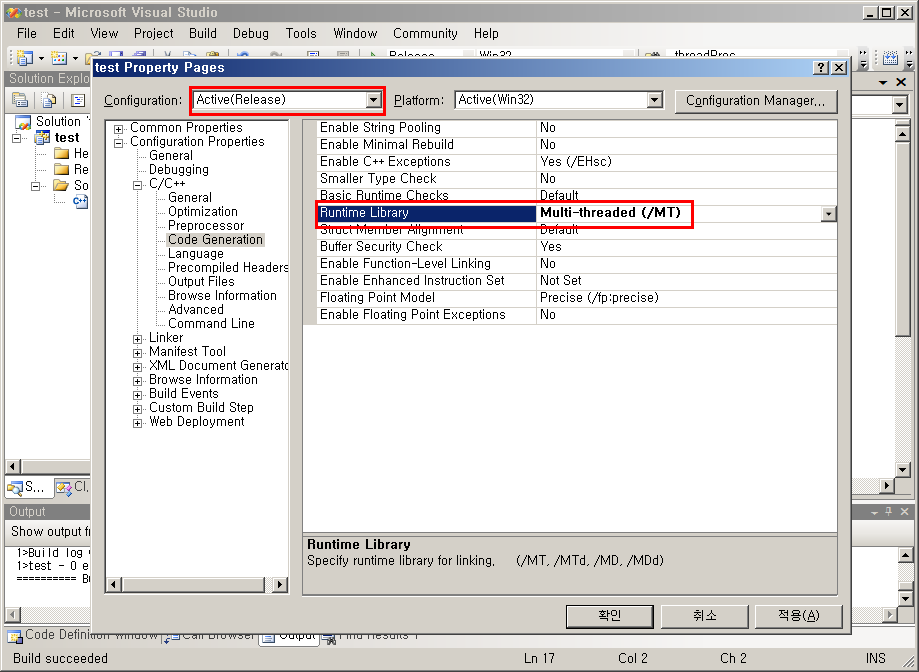
저는 Release Mode에서 컴파일을 할 때에는 Runtime Library를 "Multi-threaded (/MT)"로 합니다. 이는 Visual Studio가 설치되어 있지 않은 곳에서도 관련된 파일의 dependencies가 없어도 실행이 되어야 하기 때문입니다. Visual Studio - Project - Properties - Active(Release) - Configuration Properties - C/C++ - Code Generation - Runtime Library 에서 Multi-threaded (/MT)로 설정합니다.
그 다음에 다시 컴파일을 해 봅니다. library 파일이 없다는 link error가 뜨게 됩니다.
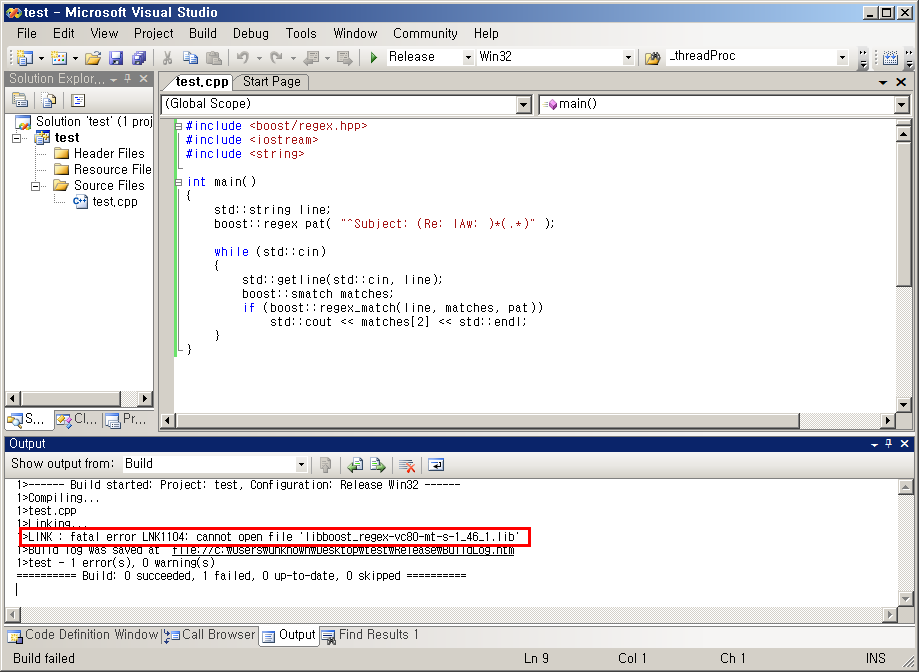
이는 bajm.exe를 이용해서 library file을 만들 때 해당 Runtime Library와 관련된 lib 파일을 생성하지 않았기 때문입니다. 다시 DOS command로 가서 ($root) 폴더에서 다음과 같은 명령어를 실행시켜 줍니다(이 또한 시간이 오래 걸립니다).
bjam variant=release link=static threading=multi address-model=32 runtime-link=static
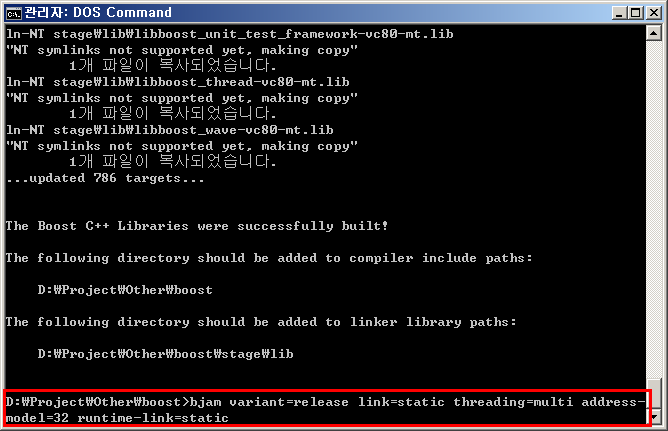
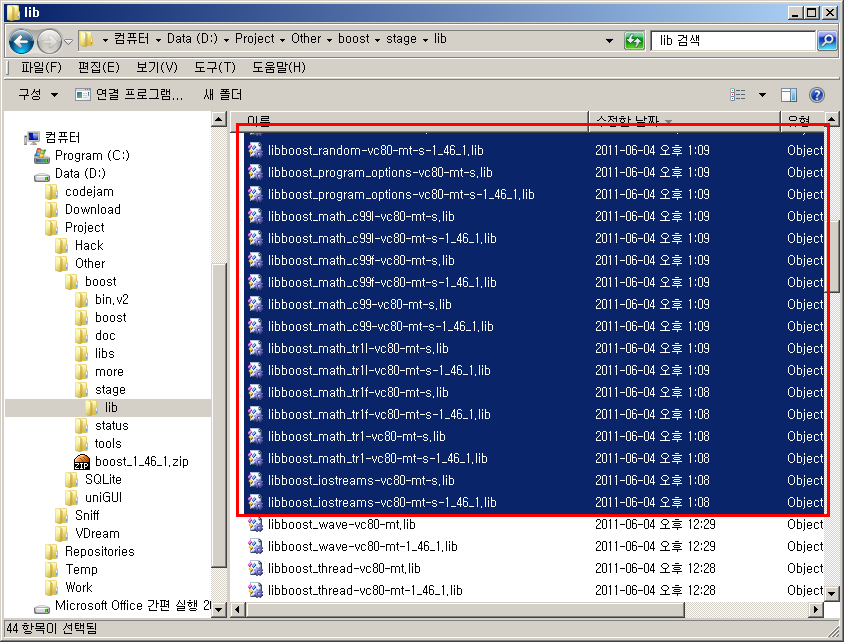
bjam 실행을 마치면 $root/stage/lib 폴더에 "*-mt-s-*.lib" 파일들이 생성되는 것을 확인할 수 있습니다.
테스트 코드를 다시 링크를 해서 제대로 링크가 되는지를 확인해 봅니다.
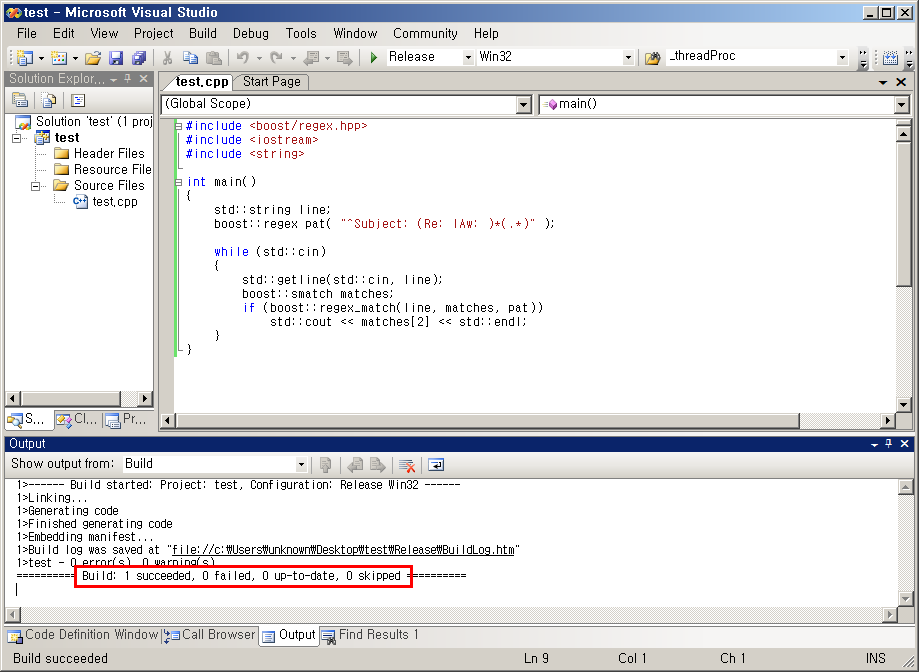
이로써 boost library가 자신의 Windows에 제대로 설치가 되었고, Visual Studio에서 컴파일 및 링크가 제대로 된다는 것을 확인하였습니다.
- boost_install_windows_sc1.png (36.6KB)(134)
- boost_install_windows_sc2.png (55.9KB)(150)
- boost_install_windows_sc3.png (59.6KB)(130)
- boost_install_windows_sc4.png (36.3KB)(137)
- boost_install_windows_sc5.png (5.3KB)(148)
- boost_install_windows_sc6.png (18.8KB)(146)
- boost_install_windows_sc7.png (56.4KB)(147)
- boost_install_windows_sc8.png (13.6KB)(149)
- boost_install_windows_sc9.png (60.3KB)(156)
- boost_install_windows_sc10.png (72.1KB)(134)
- boost_install_windows_sc11.png (61.6KB)(132)
- boost_install_windows_sc12.png (40.0KB)(134)
- boost_install_windows_sc13.png (39.7KB)(162)
- boost_install_windows_sc14.png (49.3KB)(151)
- boost_install_windows_sc15.png (41.4KB)(146)
- boost_install_windows_sc16.png (15.8KB)(169)
- boost_install_windows_sc17.png (66.3KB)(146)
- boost_install_windows_sc18.png (40.9KB)(155)
- boost.png (6.2KB)(199)
- boost_1_46_1.zip (78.20MB)(262)

